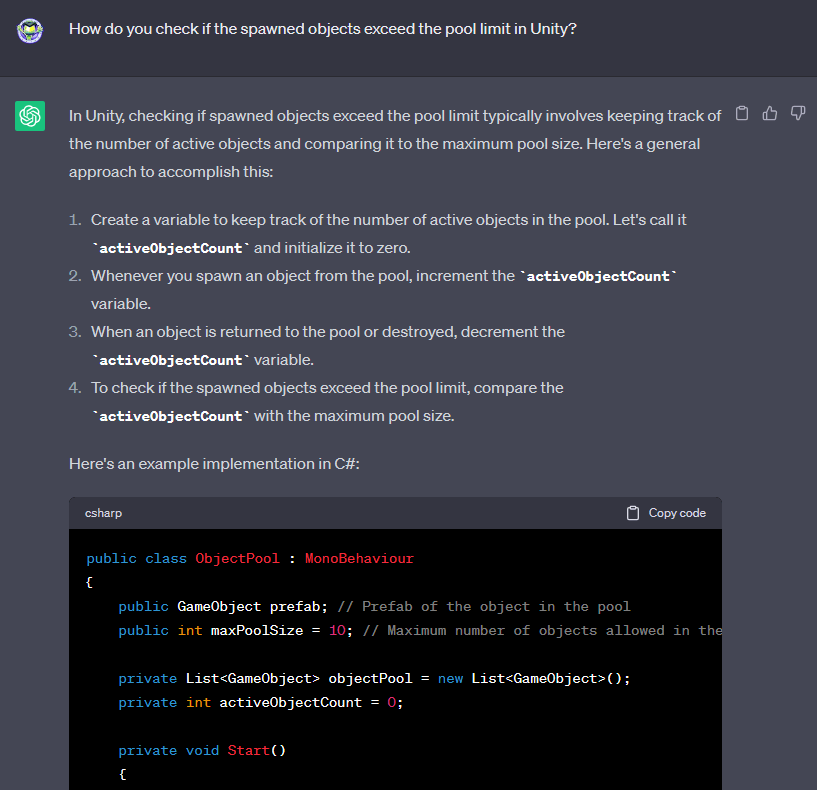
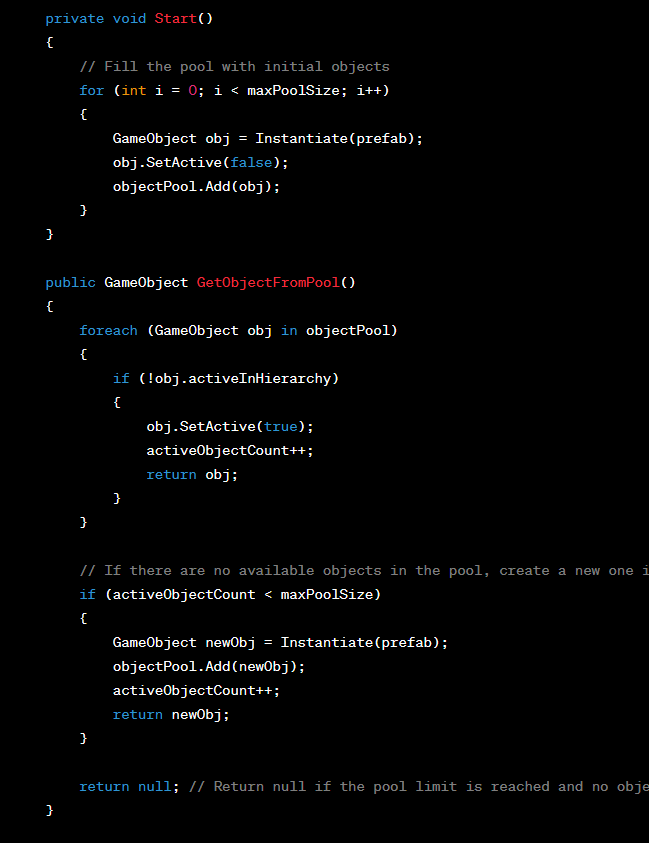
Extra! Extra! Read all about it! Today I asked ChatGPT for help for the first time. ChatGPT was extremely helpful as I asked it how to track whether or not my pool of items was over the limit. Once asked, ChatGPT got to work immediately! Not just did it give me the exact script that I needed, with adjustments to my own script, naturally, but it also gave me a full explanation on how to track it, and what this code does. The way ChatGPT explained this allowed me to easily adapt the template code to my current projects code without having to read through it, trying to make heads or tails, and eventually breaking my project in seven different ways. ChatGPT is not only a great tool for searching, but a great tool for learning, as it actively taught me how to use the script used to answer my question.
Buckle up and prepare for the ride, because I’m taking you off course today! After nearly a week of tutorials I needed to play around on my own for a little bit and decided to start making a somewhat simple game. It may look somewhat familiar to you, and that’s because it’s familiar to most of us! I’m making, to an extent, a recreation of Space Invaders!
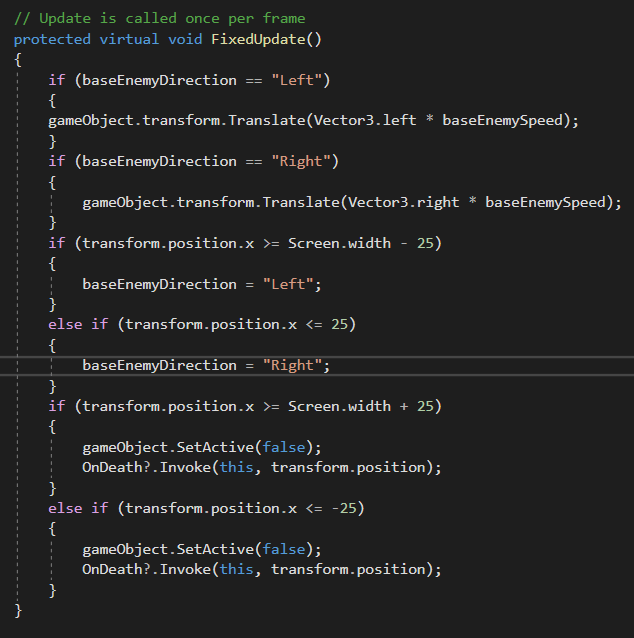
The laser and object spawning all work nearly identically to the other project I’ve been working on in the previous posts. However, we now have an enemy with movement. Not just any movement, but horizontal movement, changing directions after getting to the wall. I’m sure there is a better way to put these, but for now this will do, as it works perfectly. Next update I need to make to this game is a collision detector between the laser and the enemy ship. Overall, this has been fun messing around with so far, and I can’t wait to get the next piece of the puzzle up and running!
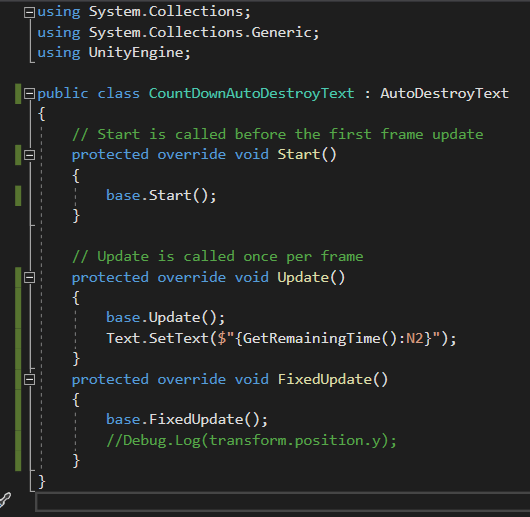
This lesson was a doozy! Only, though, from complete fault of my own. I learned all about inheritance, and how it can affect objects, and how to use it. My project has gained some major differences from the project in the tutorial, as I’ve shown in the past. For started, the text falls down off the screen, which was a challenge in the tutorial, not a long-term change, but I kept it. Another is changing the timer on the textboxes to show how long until they hit the bottom, instead of being a deletion timer. That being said, I pressed onward, trying to understand and adjust for the differences between his scripts and mine. The point of today’s lesson was to show how you can create a child variant that inherits properties from the parent object, while having some differences. This all fell apart, however, when I had to find a way to take the changes he made and make them work for the scripts that I had written. Again, understanding and adjusting!
I managed to get it working! As you’ll notice, some have timers as they have before, and some have the number 0. The variants will simply count down as usual, while the parent object keeps the number at 0 the entire time. In terms of a video game, the textboxes that say 0 could be the base enemy object, while the textboxes with the timers could be an enemy with a weapon. That, however, is this videos challenge, so you may see that concept in a future blog post. As you can see, I cleaned up my script, removing pieces that were written with the old design and function in effect. Also, I learned the purpose of Protected Virtual and Override in this script. PV in the parent object’s script allows the variant’s script to read and mimic this code in the parent object’s script. PO allows the variant object to follow an altered behavior.
This lesson was interesting, for the simple fact that it is not used for every occasion. I learned how to create an object pool, meaning the game generates a given number of a specific object and instead of deleting and creating them, it simply enables and disables them. This is great in a game where you have a limited or set amount of a specific item, however it can quickly become a problem in games where an infinite number is required. If you specifically needed an object pool in that case, you would need a variable that gets adjusted over time, such as, “if object pool is full, raise max by one.”
You may recognize these falling timers from the rest of my posts so far, as I’m slowly adding to, or editing, the original project the tutorial began with. As you can see the greyed-out objects are the ones that have been “destroyed” but reaching the bottom, and thus, disabled. Then when I have reached the end and need to place more, the game places one of the previously disabled objects instead of creating a new one. Now, there are so many different areas in the script I could show you from what I’ve updated to make this all work, but I want to show the major change. This for loop tells the game how many premade objects to have in the object pool in the “i < 20” section, 20 being the pool size. Now for the original point of this game, as the tutorial meant it, both the x and y under Vector3 should be a random range from 0 to screen width/height. However, I changed them both to -10 to make sure they start disabled and do not count toward the “Texts Died” count, due to the differences between my script, and outcome, compared to the one in the tutorial.
Bonus information, I found out how he had the game showing the text at the top left, which then allowed me to show the very “Texts Died” count at the top left corner.
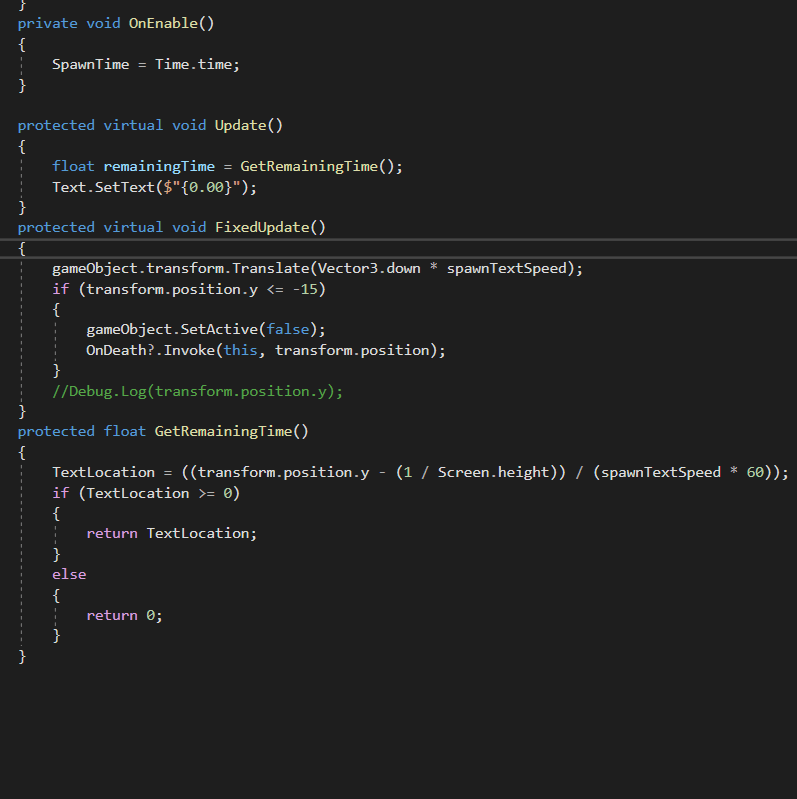
Today’s learning went a little off the rails. This lesson didn’t come from a tutorial. In fact, it came from my brother! I told him how I returned to programming, and in Unity specifically, so he challenged me. I showed him my previous post with the number falling down and his response was, “It would be super cool if they showed the amount of time they had left until they reached the bottom!” My mind immediately rushed through some potential math, which I immediately found was incorrect after trying it in the script. However, after some quick math and writing the number down to get an easier visual of the problem, I got it. Now, I’m sure any mathematician or professional programmer would say this is simple math, but I’m sure newer programmers, and anyone who didn’t get a major in math, would fully disagree. With that said, here is what I came up with!
Alright, to get started I will admit this is the same previously made project as the previous post. That being said, I took my own advice by moving the move code over to the text script, as that allowed my to more easily do the math, and was an unnecessary extra file to begin with. I also changed the speed slightly. The equation I found works the best is (y-1/h)/s/fps or for a cleaner version, (y-1/h)/(s*fps) where y is the textbox’s position, h is the screen height, s is the textbox’s speed, and fps is the game’s set fps.
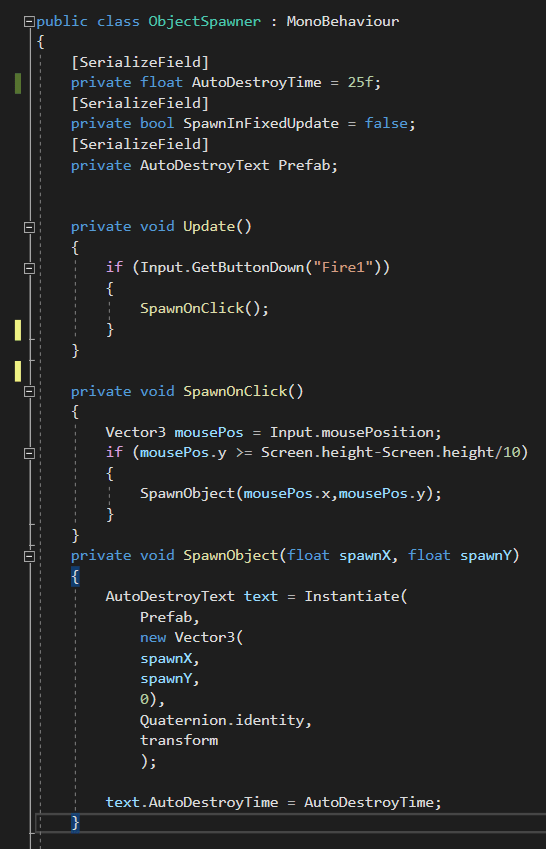
Today was an exciting day in learning programming! Not just did I learn how to create and destroy objects, I also learned how to give them motion when they are created, and how to register when the mouse is click, to create them at the mouse’s location!
For the first time, I had to implement not one, but three scripts! From left to right we have AutoDestroyText, AutoDestroyMove, and ObjectSpawner. ADText is simply there to set the time it has left, display the time left, and destroy the textbox when said time is up. ADMove is there to set the speed to a random number based on the Max and Min options set in the script, then destroy the textbox after it reaches the bottom of the screen. Looking back at it, I could very much have put this code inside the ADText script, but I did not realize that at the time. Now for the file that does the heavy lifting, the ObjectSpawner script. This script was originally designed to spawn a textbox at a random location every update. However, I changed it to create a textbox at the location of the mouse anytime it registers a left click. Now you may be wondering why I have the SpawnOnClick event, instead of having it happen in the update command, and my answer to that involves accidental code that I edited. That being said, it keeps the actual Update event much cleaner, allowing me to see more clearly, what is happening.
Welcome back! Today I moved to the next step of programming; Arrays and Loops! I remember for loops and while loops from high school, but I actually learned some new ones during this tutorial!
Now this may look similar to the previous one, however, it’s actually a bit more complex! For starters, I moved the script from the text box, over to the background, and make the textboxes into children in the hierarchy to that same background. Next, I created a for loop, making sure to update the text on every textbox, not just the first one.
After having all textboxes show the updated number, I then went to write every version of this loop, so see the major differences between them. Below, you can see the different variants. The while loops created the variable outside, then updates the variable inside, as opposed to being inside the single line in the for loop. The do while loop is an interesting one, but has it’s faults. If the value is zero on the first update, then it will be skipped, due to the check happening at the end of the loop. The final two, foreach and for, are simply another way to go about the process all together. The foreach loop actively decides how many textboxes are in the array of textboxes and does them all at once, as opposed to the rest, which loops based on the count. The final for loop shows a rephrasing of the code, where it looks at the array within the loop itself, as opposed to looking at the loop outside of the loop.
Hello, and welcome to my blog! Firstly, I’d like to give some background information of myself. I learned, back in High School, how to program in Java, some Visual Basic, Game Maker, and even in Flash, though that knowledge is sadly no longer relevant. Since then, I have not kept up with it, and have surely forgotten most of what I learned. That’s where the title of this blog comes in! I am learning, and partially relearning, how to write scripts! Follow along in my journey to learn with me, as I dive into Unity, and all it has to offer!
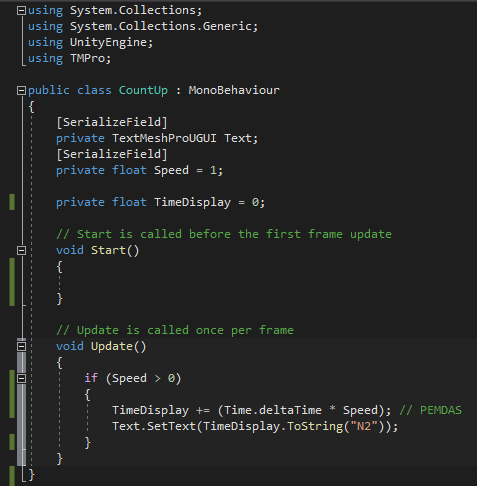
You may be thinking, “Wow, that’s so cool, how did you do this?” The answers simple, and it starts with a tutorial, here! That being said overall it was fairly simple, and super fun! For now, you’ll be following along my journey through tutorials, but soon enough I’ll be working on more advanced pieces! The script below is responsible for the image above, with some very simple programming! Adding the TMPro at the top allows for the script to connect to the Unity Text Box, then you see where I initialized the variables. Those are required for us to do pretty much anything. Next, I work with an if statement, which prevents the updates from happening when Speed gets reduced below zero. Within the if statement, we have the important bit. The first line adds the amount of time from one frame to the next, and we multiply it by the speed, to be adjustable. The second line takes that result, and sets the text box to that value, to the nearest 100th, which is what N2 means. N2 can be changed to the number of digits you need after the decimal point, such as N3 or even N9.
Thank you for reading and following along in my new journey, as I have a long way to go, and a lot to learn!